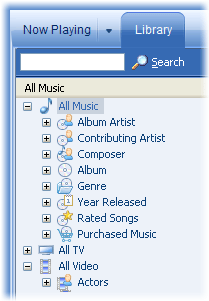
You can use Microsoft Windows Media Player 10 to organize your digital media collection. The first step in getting organized is to add your content to the Library feature of the Player. Adding content to the library is a required step before performing other Player tasks, such as burning, creating playlists, or synchronizing files to portable music players. When you add it to the library, your content is automatically organized into categories, which makes it easy to find and play.

|
| The library automatically organizes music into categories such as album artist and genre. |
|
|
Adding Content to the Library
You have a number of options for adding content to your library. When you rip (copy) music from your audio CDs to your computer or download files from online stores, the files are automatically added to your library. The purpose of this section is to explain how to add digital media files that are already on your computer to your library.
To add content to your library
Keeping the Library Up to Date
The Player can monitor the music and video folders on your computer for changes and then automatically update the library. This is particularly useful if you add or remove files regularly, because the Player automatically reflects any changes you make. You don't need to remember to update the library.
To specify folders to monitor
Another option you have for keeping your library up to date is to have music files be automatically added to your library when you play them. To turn this option on, select the Add music files to library when played check box on the Player tab of the Options dialog box.
Updating Media Information
An important component of a well-organized library is accurate media information. If the Player cannot find media information for an item or if the information is incorrect, you can edit the information yourself. You have a number of options for editing media information in the Player; the following steps describe how to edit a column in the library. In this example, several songs are in the Unknown category in the library, because album information for the songs is missing. After the album information is added, the songs are moved to the correct Album category in the library.
To update or edit media information